Mist does something rare for a landscape photographer: it takes things away. Hillsides lose their clutter, backgrounds dissolve, and a scene that looked busy and ordinary in flat daylight suddenly has three layers and a shape. Britain gets plenty of it, especially from September through to November, when clear nights meet damp ground above a river valley.
The catch is that mist is fleeting and it punishes guesswork. Arrive late and you photograph grey soup. Expose it badly and you photograph grey mush. What follows is the whole chain, from judging whether tomorrow morning is worth the alarm to coming home with a picture rather than a memory of one.
Why mist makes the job easier
Fog is essentially a huge softbox. It scatters light, lifts shadows and flattens contrast, so highlights are far less likely to blow and your histogram sits comfortably inside the frame. The technical side becomes forgiving, which is useful, because it means mistakes in timing and composition show up clearly instead of hiding behind drama.
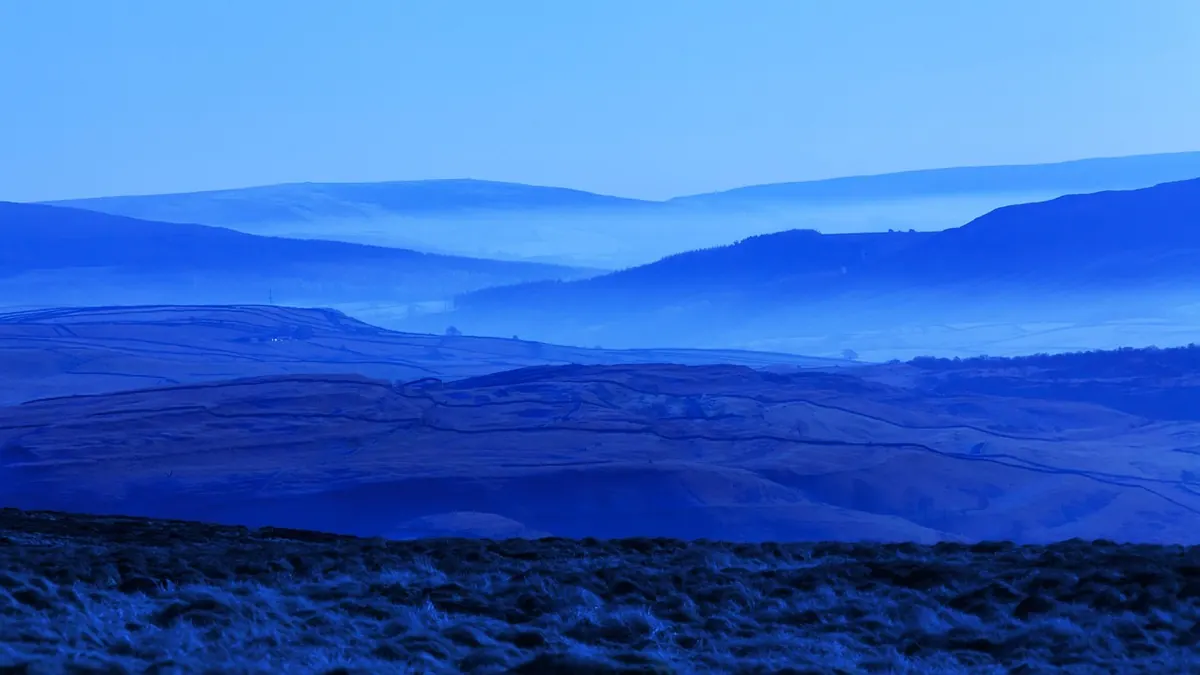
The bigger gift is separation. Ridges you would never notice behind a wood read as distinct shapes. Trees, church towers, hedgerows and telegraph poles become silhouettes. The landscape turns graphic, and graphic is what a photograph needs.
Then there is movement. Over a thirty-second exposure, mist drifts through a valley like slow water. At a hundredth of a second, it is texture. Both are worth having, and you get to choose on the day.
Judging the forecast the night before
You cannot order mist, but you can improve your odds. It forms when air cools to the point where it can no longer hold its moisture — the dew point — and that normally happens on clear, calm nights as the ground radiates heat away.
Temperature and dew point
Weather apps list both. When the overnight minimum sits within a degree or two of the dew point, expect moisture to condense somewhere nearby. Somewhere is the problem: it may be three valleys away from your chosen car park.
Where it gathers
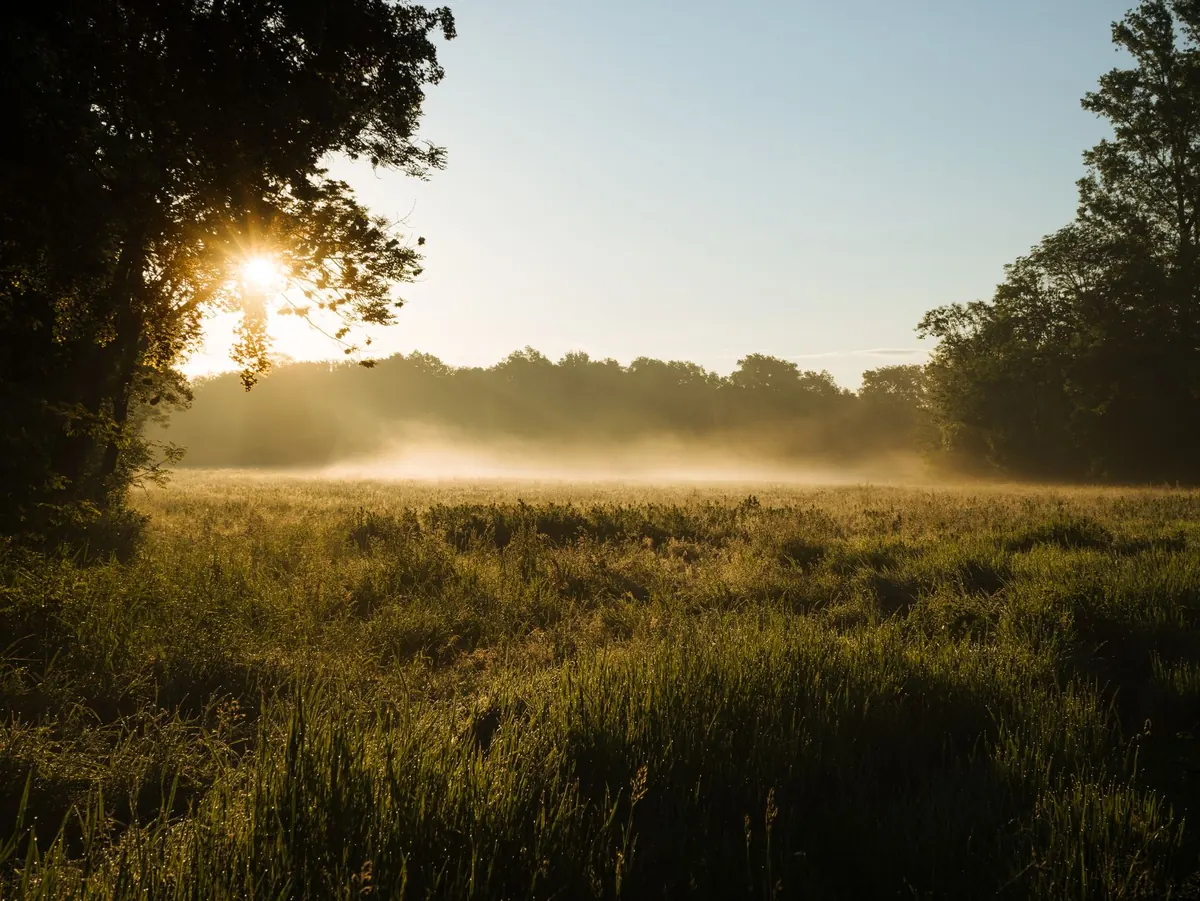
Cold air drains downhill, so mist collects in valleys, hollows and anywhere close to water — a river, a canal, a reservoir, a lake. Higher ground often stays clear above it, which is why a hilltop looking down on a fog-filled valley is such a dependable shot.
Wind and cloud
A completely still night gives you a flat, uniform fog that is surprisingly hard to photograph. A light breeze is better: it pushes the mist around, opens gaps and creates the half-there, layered look most of us are after. Thick high cloud that keeps the night warm usually stops mist forming at all. Hill fog forecasts, webcams and a glance at the sky before bed are all worth two minutes of your evening.
Arrive early, and know where you are standing
Aim to be in position 45 minutes before sunrise. Mist is usually at its thickest just before dawn and starts to lift the moment the sun touches it — sometimes within ten minutes, occasionally in two. Those first minutes of cool blue light are as good as anything that follows.
Recce in daylight. Know where you can park without blocking a farm gate, which path leads to your view, and where the ground turns to bog. Set off with a headtorch, allow more time than you think you need, and if you are heading somewhere remote, tell someone where you are going and when to expect you back. Do not walk onto frozen water, and leave every gate as you found it.
Exposing for a bright white world
Your camera meter has no idea it is looking at mist. It assumes an average scene and dutifully turns your glowing white field into dull grey. So add light: start at +1 EV and adjust from there. On many mornings, +1½ EV is closer to right.
Trust the histogram, not the screen. In mist, a healthy histogram sits to the right, with highlights reaching the edge without piling up against it. If they are stacked at the right, pull back a third of a stop and shoot again.
Settings that work
- Raw, always — you will want the room to adjust white balance later.
- ISO 100–400, with a tripod so you can keep it low in the gloom.
- f/8 to f/13 for depth of field across those layers.
- Manual focus, or single-point autofocus on a clearly defined edge. Low-contrast mist makes autofocus hunt.
- Daylight white balance, then warm or cool the file afterwards. Pre-dawn mist is blue; sunrise turns it pink, then gold.
Composition: layers, gaps and a dark anchor
Mist hands you two things — layers and empty space — and the strongest photographs use both rather than fighting them.
Hunt for repeating silhouettes: a series of ridges, a line of trees along a field boundary, fence posts stepping downhill. A longer lens compresses those bands together and exaggerates the depth, which is often more effective than a wide view of everything.
Then find something dark and solid to plant in the frame. A lone oak, a gate, a drystone wall, a jetty, a sheep standing in the murk. Something bright or dark gives the eye a place to rest and the picture a sense of scale.
Watch for gaps. As the sun rises, it punches through and lights patches of mist from behind; those moments last seconds. And move your feet. Five metres sideways changes the arrangement of layers completely, and the mist is not waiting for you.
Kit and comfort
Standing still in a cold field at dawn is a different activity from walking in it, so dress for the stationary version.
- A tripod, because the light is low and the exposures are long.
- A lens hood to keep stray light and drizzle off the front element.
- Two microfibre cloths, one kept dry in an inside pocket.
- Headtorch, spare batteries, and a spare memory card.
- Thermal layer, hat and gloves — the last twenty minutes before sunrise are the coldest.
- Wellington boots and, in summer, midge repellent if you are anywhere in the west or north.
Condensation catches people out. Step from a warm car into cold air and your lens will fog; wiping it only smears it. Give the camera five or ten minutes to acclimatise and avoid breathing across the glass while you work.
Your first misty morning: a simple plan
- Check the overnight minimum temperature, dew point and wind speed before bed.
- Choose two locations within a short drive of each other, ideally one low and one slightly elevated.
- Arrive 45 minutes before sunrise and set up before you need to.
- Set +1 EV, check the histogram and fine-tune.
- Shoot the blue hour, the first light, and the sun breaking through.
- Stay ten minutes longer than you want to — the best frames often arrive as the mist begins to tear apart.
If nothing forms, that is normal. Misty mornings are largely a numbers game, and the photographers who get them are the ones who go out often, on unpromising mornings as well as promising ones. Learn one valley well, return to it through the autumn, and you will eventually be standing in exactly the right place when the water vapour does what you wanted.